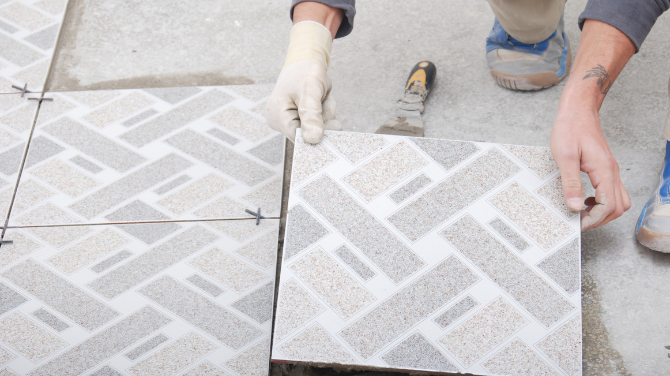
The long-term integrity of the tile installation can only benefit from careful underfloor preparation. A clean, level, one-inch-thick subfloor is necessary for the installation of ceramic floor tiles. Additionally, the subfloor must be designed to be stable and strong enough to support the weight of the tiles without flexing or sliding. The likelihood of broken tiles is considerably increased by a dirty, unlevel, unstable, or weak subfloor. To avoid any potential problems and ensure that the installation is successful, it is important to adequately prepare the subfloor before laying down the tiles. The best way to ensure that the subfloor meets all of these requirements is to inspect it carefully and address any issues with the existing subfloor before beginning the tile installation process. Once the subfloor has been inspected and any necessary repairs have been made, it is important to ensure that the subfloor is clean and free of debris before beginning the tile installation process.
Here is a guide for the appropriate tiling process
Clean The Subfloor
Clear away any dirt, debris, etc., and then use simple water to clean the flooring. Then, use a brush and a mixture of a degreasing cleanser and warm water to scrub the floor completely. The subfloor should then be thoroughly rinsed and allowed to air dry overnight. For extra protection, a sealer can be applied after the subfloor is dry. After the sealer is dry, you can use a mop and cleaner to maintain your flooring’s original appearance. Once the cleaning is done, it’s important to make sure all excess water has been removed from the subfloor in order to prevent the growth of mold and mildew. A spotless surface will guarantee that your tiles adhere to the subfloor suitably. Tile fractures can result from unevenness brought on by dirt or debris. To ensure that the surface is clean and clear of any dirt or debris, use a vacuum cleaner to carefully sweep the floor.
Level the Subfloor
A level subfloor made of wood or concrete is necessary for a successful tile installation. Builders might sand wood subfloors to make them level in preparation for tile installation. However, it may be necessary to provide supportive bridging between the joists or nails into the joists for wood subfloors that flex or shift when stressed. This is important to ensure that the subfloor does not flex or shift after installation, as this can cause tiles to become loose and create an uneven surface. To reduce the possibility of problems after installation, builders should use bridging material between joists that are far apart or nail the subfloor directly to the joists. Concrete subfloor preparation for tile: To level and smooth out concrete subfloors, contractors might use a leveling solution like LM-85 SSL.
Fill Subfloor Cracks and Holes
Fill in gaps and cracks that are not moving with a roller or brush. For applications down to 25°F (-4°C), Liquid Glue, a rubber-based adhesive in a solvent solution, primes all structural wood, concrete, or masonry surfaces. Liquid Glue is ideal for outdoor repairs because it is water-resistant and can bond to damp or dry surfaces. Liquid Glue forms an extremely strong bond, even when bonding two different materials together, and it does not shrink when applied and dried Another liquid adhesive, a low-tack, rubber-based, water-based adhesive, primes all structural wood, concrete, or masonry surfaces for use in environments with surface temperatures of at least 40°F (5°C) and ambient temperatures of at least 0°F (20°C). This adhesive is a safe and effective choice for use in projects that require adhesion to surfaces that are not able to reach the temperature requirements of more traditional adhesives.
Notes:
● Before applying the adhesive, stir it.
● Avoid using multiple coats or excessive amounts of adhesive.
● The tile will crack at the slightest subfloor imperfections or fissures.
Apply a membrane underlayment to prevent fractures.
An anti-fracture underlayment membrane can be installed after the subfloor has been suitably prepared. The membrane, when fitted in accordance with the manufacturer’s recommendations, produces a layer between the subfloor and the tile that absorbs stress caused by a broken subfloor and stops it from moving up and cracking the tile. By reducing the movement of the subfloor, an anti-fracture underlayment membrane can help prevent tiles from cracking over time, extending the life of a tiled surface. Therefore, installing an anti-fracture underlayment membrane is a great investment for homeowners who want to protect their tile flooring and keep it looking good for years to come, not only is it cost-effective to install an anti-fracture underlayment membrane, but it can also save homeowners a lot of money and stress in the long run.
Conclusion
A clean, level, one-inch-thick subfloor is necessary for the installation of ceramic floor tiles. The subfloor must be designed to be stable and strong enough to support the weight of the tiles without flexing or sliding. The best way to ensure that the subfloor meets these requirements is to inspect it carefully and address any issues with the existing subfloor before beginning the tile installation process
Redwop has carved a name for itself in the realm of flooring material and solution manufacturing. Owing to our range of solutions, expertise, and innovative products we have earned the trust of thousands of distributors and customers across the world map. Whether you are looking for first-rate epoxy floorings, cementitious floorings, or PU floorings, Redwop is the one-stop destination for all your needs.

